The leaves are turning yellow, red and brown, days are getting shorter and mornings & evenings are getting colder. Yep, fall has arrived! That’s a fact we can’t deny anymore. Did you also notice that your ears are getting a little bit chilly when you step outside? We have the perfect solution for those poor ears: our 20’s Style Headband! A stylish yet timeless headband that is perfect for those typical fall days.
Have you ever wondered what to do with your hair when you are wearing this headband, besides the classic hairstyles like loose hair, a ponytail or a bun? You don’t have to wonder anymore! We came up with 5 headband-proof hairstyles you can wear all fall and winter long. In this blog post you can find 5 tutorials with only 6 steps each to transform your hair.
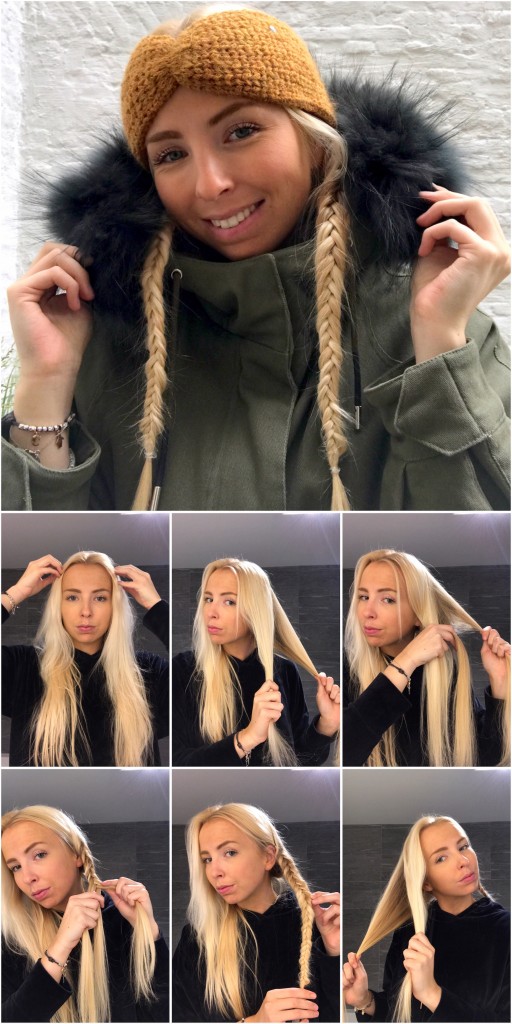
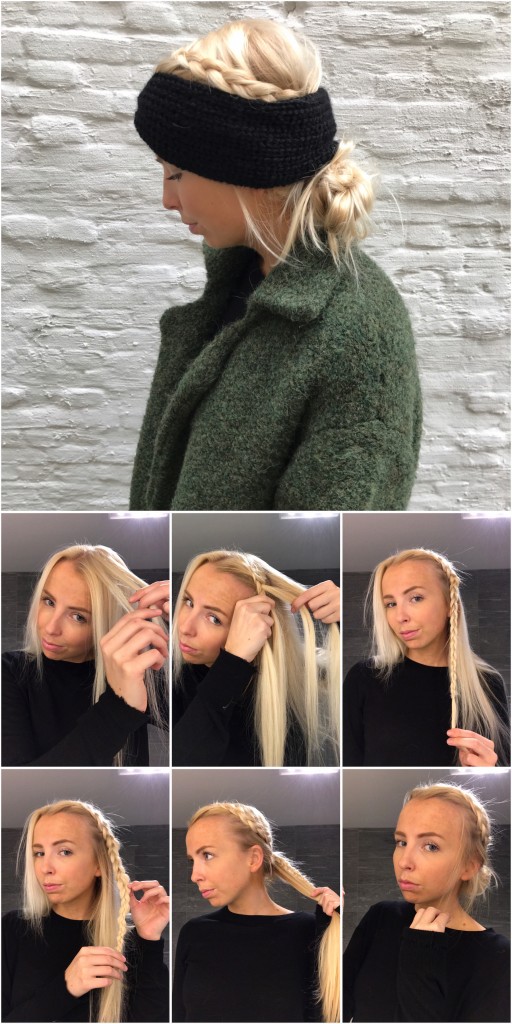
1. Fish-/ponytail braids
- Step 1: part your hair in the middle and separate it into two sections.
- Step 2: take the left section and separate into two sections.
- Step 3: take a small side piece from the right section and cross over the whole section, bringing the piece to the center between both sections. Then, do exactly the same but take a small side piece from the left section.
- Step 4: repeat until you finish the braid and put an elastic band around it.
- Step 5: make your braid a little bit broader by holding the braid tight with one hand and pulling (carefully!) out the little strands with your other hand.
- Step 6: take the right section of your hair and repeat these 5 steps.
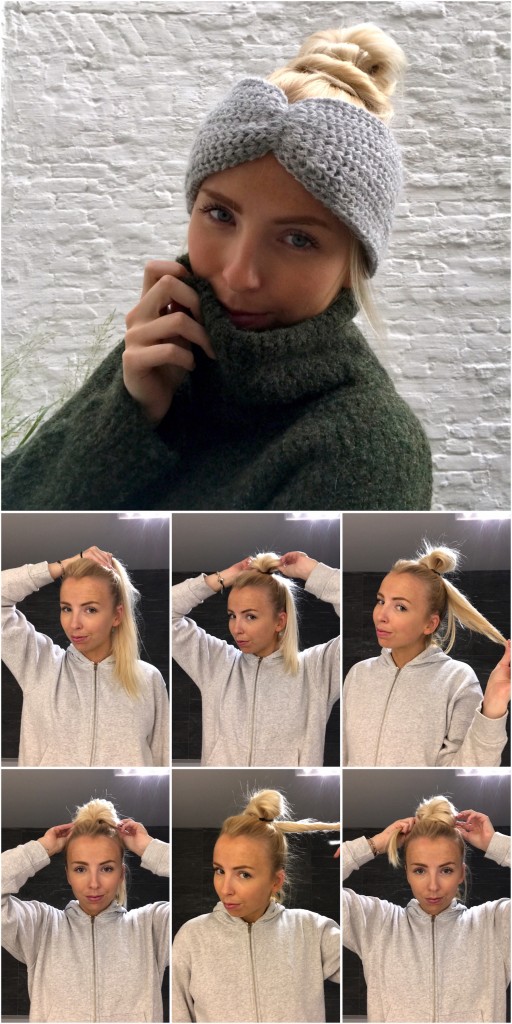
2. Messy bun
- Step 1: make a high ponytail.
- Step 2: pull your hair through the elastic band and stop in the middle.
- Step 3: make sure you have enough hair left out of the elastic band.
- Step 4: make the bun a little bit broader by pulling on both sides.
- Step 5: take the part that you left out and twist it around until you have a twist effect.
- Step 6: turn it around the bun (and hide the elastic band) and secure it with a couple of bobby pins.
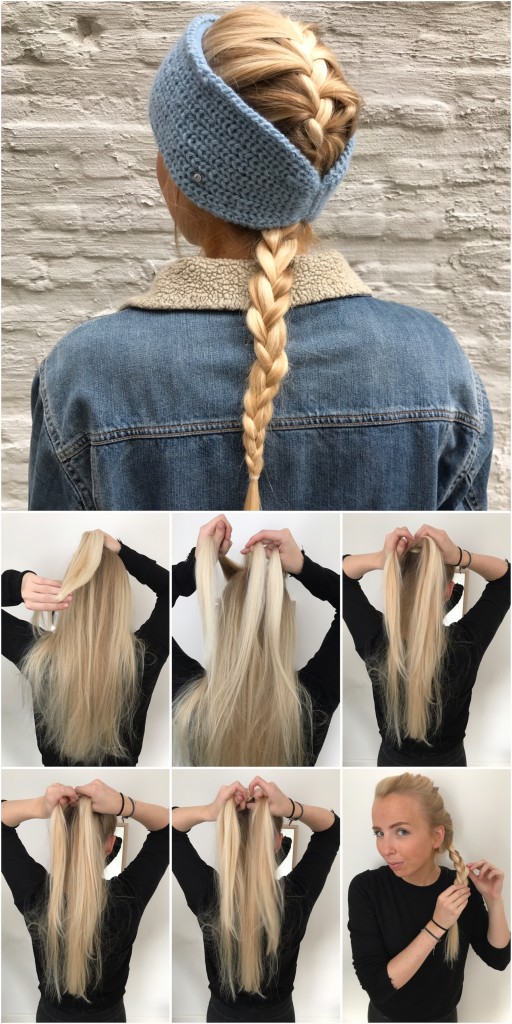
3. French braid
- Step 1: make a high ponytail.
- Step 2: pull your hair through the elastic band and stop in the middle.
- Step 3: make sure you have enough hair left out of the elastic band.
- Step 4: make the bun a little bit broader by pulling on both sides.
- Step 5: take the part that you left out and twist it around until you have a twist effect.
- Step 6: turn it around the bun (and hide the elastic band) and secure it with a couple of bobby pins.
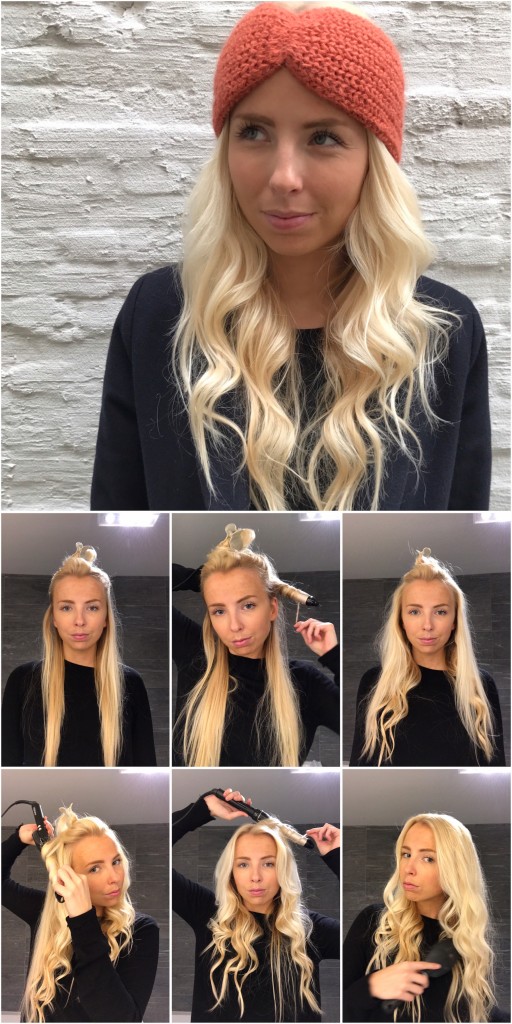
4. Hollywood curls
- Step 1: put the top part of your hair together on top of your head.
- Step 2: twist your hair around the curling iron (twist your hair away from your face) and hold it for 15 seconds. Repeat.
- Step 3: curl the middle part of your hair in the exact same way as in step 2.
- Step 4: repeat.
- Step 5: curl the top part of your hair in the exact same way as in step 3.
- Step 6: gently brush your hair and secure those beautiful Hollywood curls with some hairspray.
5. Dutch braid & messy bun
- Step 1: divide your hair in a side part. Take a little section in the middle, on top of your head. Divide this section in 3 pieces.
- Step 2: take one section of each side and cross them under the center section. Repeat this 4 or 5 times.
- Step 3: braid the other part of the braid like a normal braid (still cross the parts under the section) and put an elastic band around it.
- Step 4: make your braid a little bit broader by holding the braid tight with one hand and pulling out (carefully!) the little strands with your other hand.
- Step 5: put all your hair together in a low ponytail.
- Step 6: make a bun and pull out some little hairs on the front of your head to give it a messier look.




1 comment
Geweldige post!
Ik was al onder de indruk van deze geweldige combo’s die via Instagram te zien waren.
Thx for the tips (& Charlotte, looking very good !)